
Metal Poster Magnetic Hanging System
How to Hang your Metal Poster With a magnetic hanging system, you can mount your artwork cleanly, securely and level in under one minute with no tools required. This guide walks you through everything you ne
2025-01-17 15:00:00

DDA Collectibleshave been kicking many goals of late, first with their plastic kits of the HQ Holdens, then following up with the HJ Panel Vans, then the XW & XY Falcons and recently, the LC & LJ Toranas, so I was very excited to get my hands on their brand new Torana A9X kits.
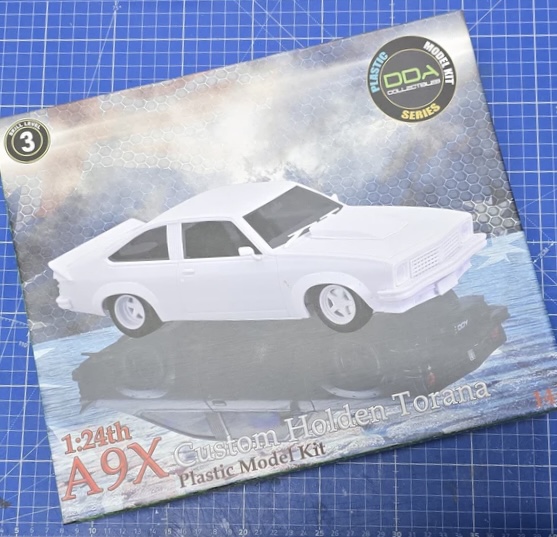
The A9X was a special option available on the LX Torana that was produced in the late 1970’s. It featured different options such as the bonnet scoop, rear spoiler, rear disc brakes and a heavy duty differential amongst others. It was famously raced at Bathurst, where it was driven by Australian motoring legend, the late Peter Brock.
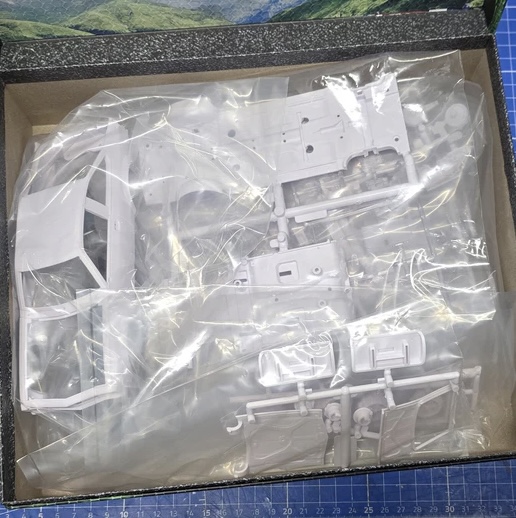
Once the kit arrived, I quickly got out the body, bonnet and rear window / boot lid, and began to paint. I didn’t want anything boring, so went with something a little more exciting, Colour Shift Extreme ‘Supernova’. To begin with, the parts were given a base coat of Chassis Black.
The parts were very well moulded with no imperfections, so I skipped the primer step and went straight to the paint proper. This is the advantage of using a solvent based paint such as SMS as the solvents in the paint will bond strongly with the plastic.
With the black down, I added two coats of the Colour Shift Extreme ‘Supernova’, making sure to an even coverage all over.
I put that aside and then airbrushed Chassis Black on to everything else including the chassis and the interior parts. Chassis Black is a great colour for simulating black leather.
The next day I returned and started the clear coat process. For this, I used Super Clear and airbrushed it on at 15psi. The first coat was applied lightly which then acted as a tack coat to aid in the adhesion of the next layers. The second coat was applied after about 15 minutes, again lightly but heavier than the first. I then left that sit for an hour or so and then returned back with a third coat which was heavier again. It was then put to the side to cure and I turned my attention to the chrome parts.
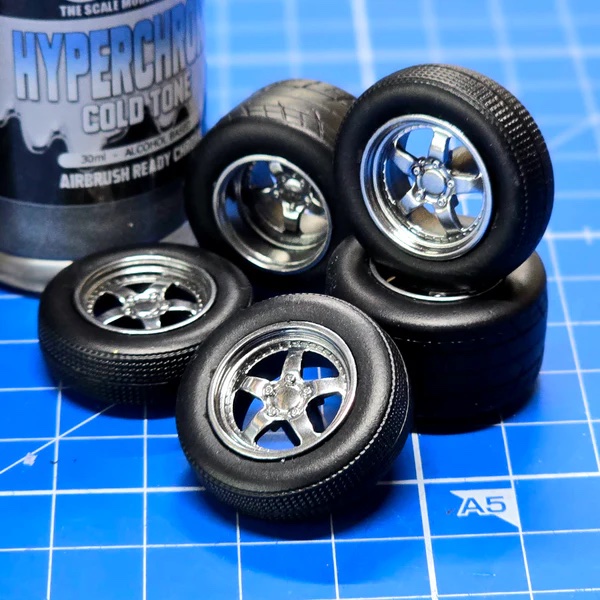
Chrome effects are very simple to create with SMS. First, the pieces were base coated with Chassis Black and then they were given two coats of Super Clear to get them nice and smooth. Smoothness of the base coat is the key to getting a reflective finish to the chrome, so getting this step right is crucial.
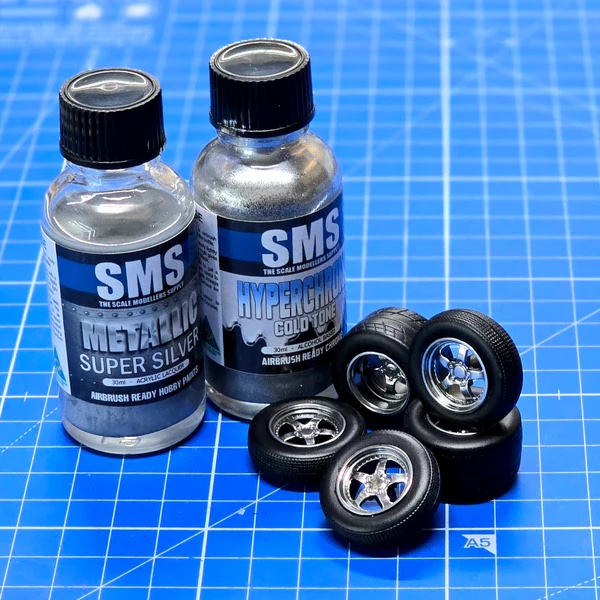
There are two main ways to create chrome with SMS, first is with Super Silver and second (which is the easiest) is with HyperChrome. A big issue with HyperChrome is that due to the nature of the pigment, we need to use an alcohol base solvent mix to suspend the pigment without dissolving it. As such, the adhesion is relatively weak in comparison to our Acrylic Lacquers (which Super Silver is one) and the HyperChrome can rub off with too heavy handling.
When this occurs, the black base coat comes through, ruining the chrome finish. I thought I would try something a little different this time and used the more resilient Super Silver first and then HyperChrome on top of that. The idea behind this change in process is that if the HyperChrome did manage to be rubbed off at any stage, then the Super Silver will be what becomes visible rather than black, meaning that it is less likely to stand out and blend in better.
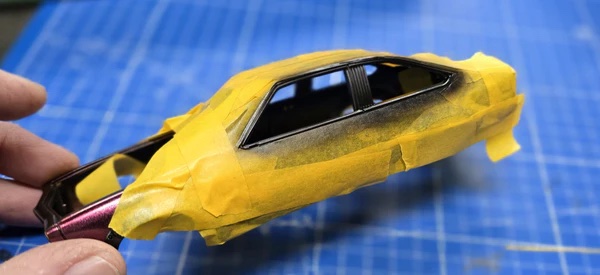
With all the chrome parts done, I then returned back to the body. Before I did anymore clear coating, I masked off the wheel flares and the window trims and airbrushed them with Chassis Black. This gave a good contrast against the colour shift once I removed the tape. I was quite happy with how it was looking so went back to clear coating and added another 5 coats of Super Clear, making sure to apply in a slightly heavier coat with each applied.
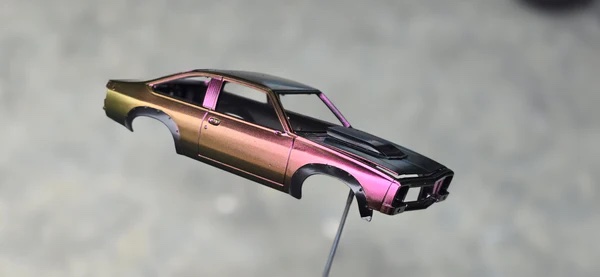
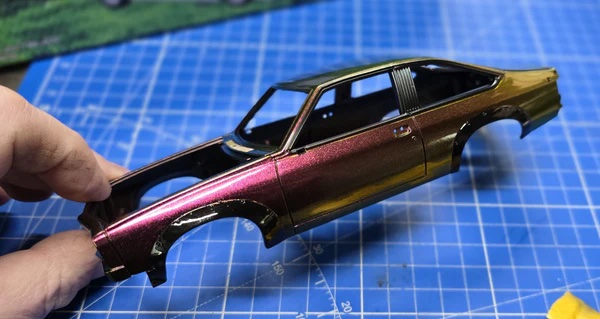
I left it overnight again, and then it was time to put it all together. As with all the previous DDA kits, it assembled very well in the end and after about 10 minutes, everything was done and the A9X was complete.
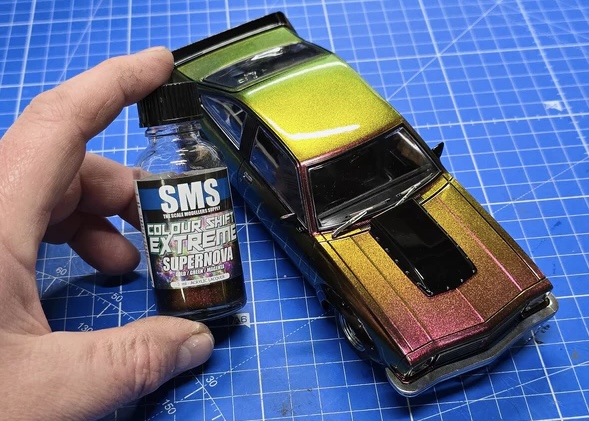
I quite enjoyed doing this one and I’m glad I went down the route of the Colour Shift for the body. As much as I like a factory colour on these cars, nothing beats a great Colour Shift or Pearl on them!
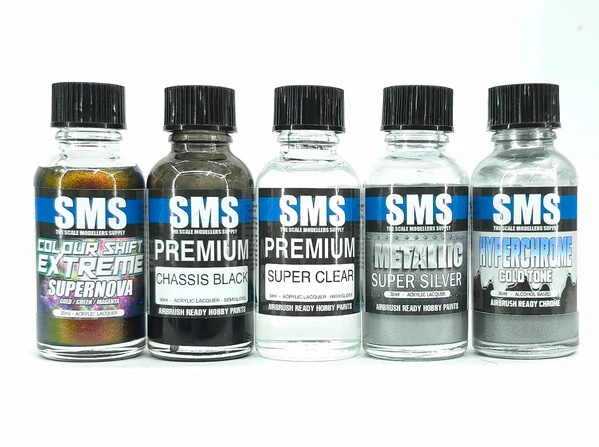
Here are all the colours used:
Here’s some pictures of the completed A9X, take note of how awesome the Colour Shift looks from different angles and under different light sources.
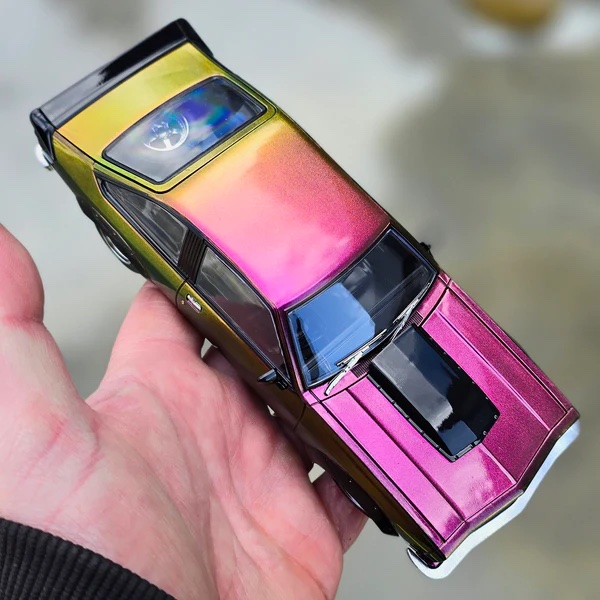
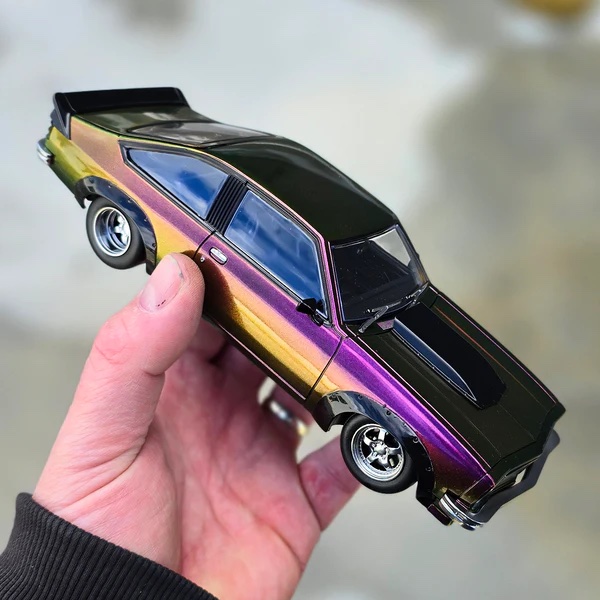
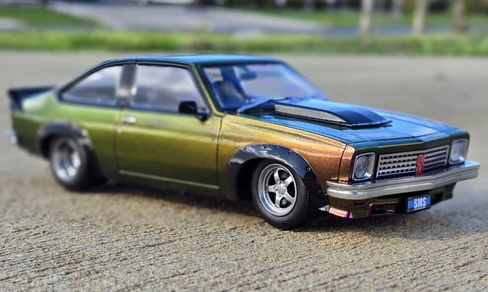
I hope you enjoyed his build as much as I did in creating it. The kits are now available for RRP $69.95, make sure to check out our Colour Shift range to see if there’s one you might like to use on your build.
Keep on modelling!
Scott Taylor
The Scale Modellers Supply